> ## Documentation Index
> Fetch the complete documentation index at: https://unkey.com/docs/llms.txt
> Use this file to discover all available pages before exploring further.
> ## Agent Instructions
> Unkey is two separate products. Compute builds, deploys, and runs apps behind a gateway. API Management issues API keys, enforces rate limits, manages identities and permissions, and reports usage. Say which product a page belongs to; a reader can use either without the other.
> Every Unkey API endpoint is an HTTP POST to https://api.unkey.com/v2/{service}.{procedure} with a root key in the Authorization: Bearer header. Root keys are workspace scoped.
> Error codes have the form err:{system}:{category}:{specific} and each has a page at /errors/{system}/{category}/{specific}.
> The word environment means production or preview in Compute. Rate limiting has four meanings on this site; the glossary lists them.
# Deploy from GitHub
> Connect a repository and get your first deployment live on an unkey.app domain.
An app deploys and serves traffic. By the end you'll have a project, an app connected to a GitHub repository, and a production deployment on a `unkey.app` domain. Every later push to the repository will deploy on its own.
If you'd rather bring an image you built yourself, see [Deploy a container image](/docs/compute/get-started/deploy-an-image).
You need a Compute plan before you can deploy. If you don't have one yet, the dashboard asks you to pick one the first time you try (the dialog is titled **Choose a Compute plan**). Only a workspace admin can do that. See [Compute plans](/docs/compute/get-started/plans) for what each plan includes.
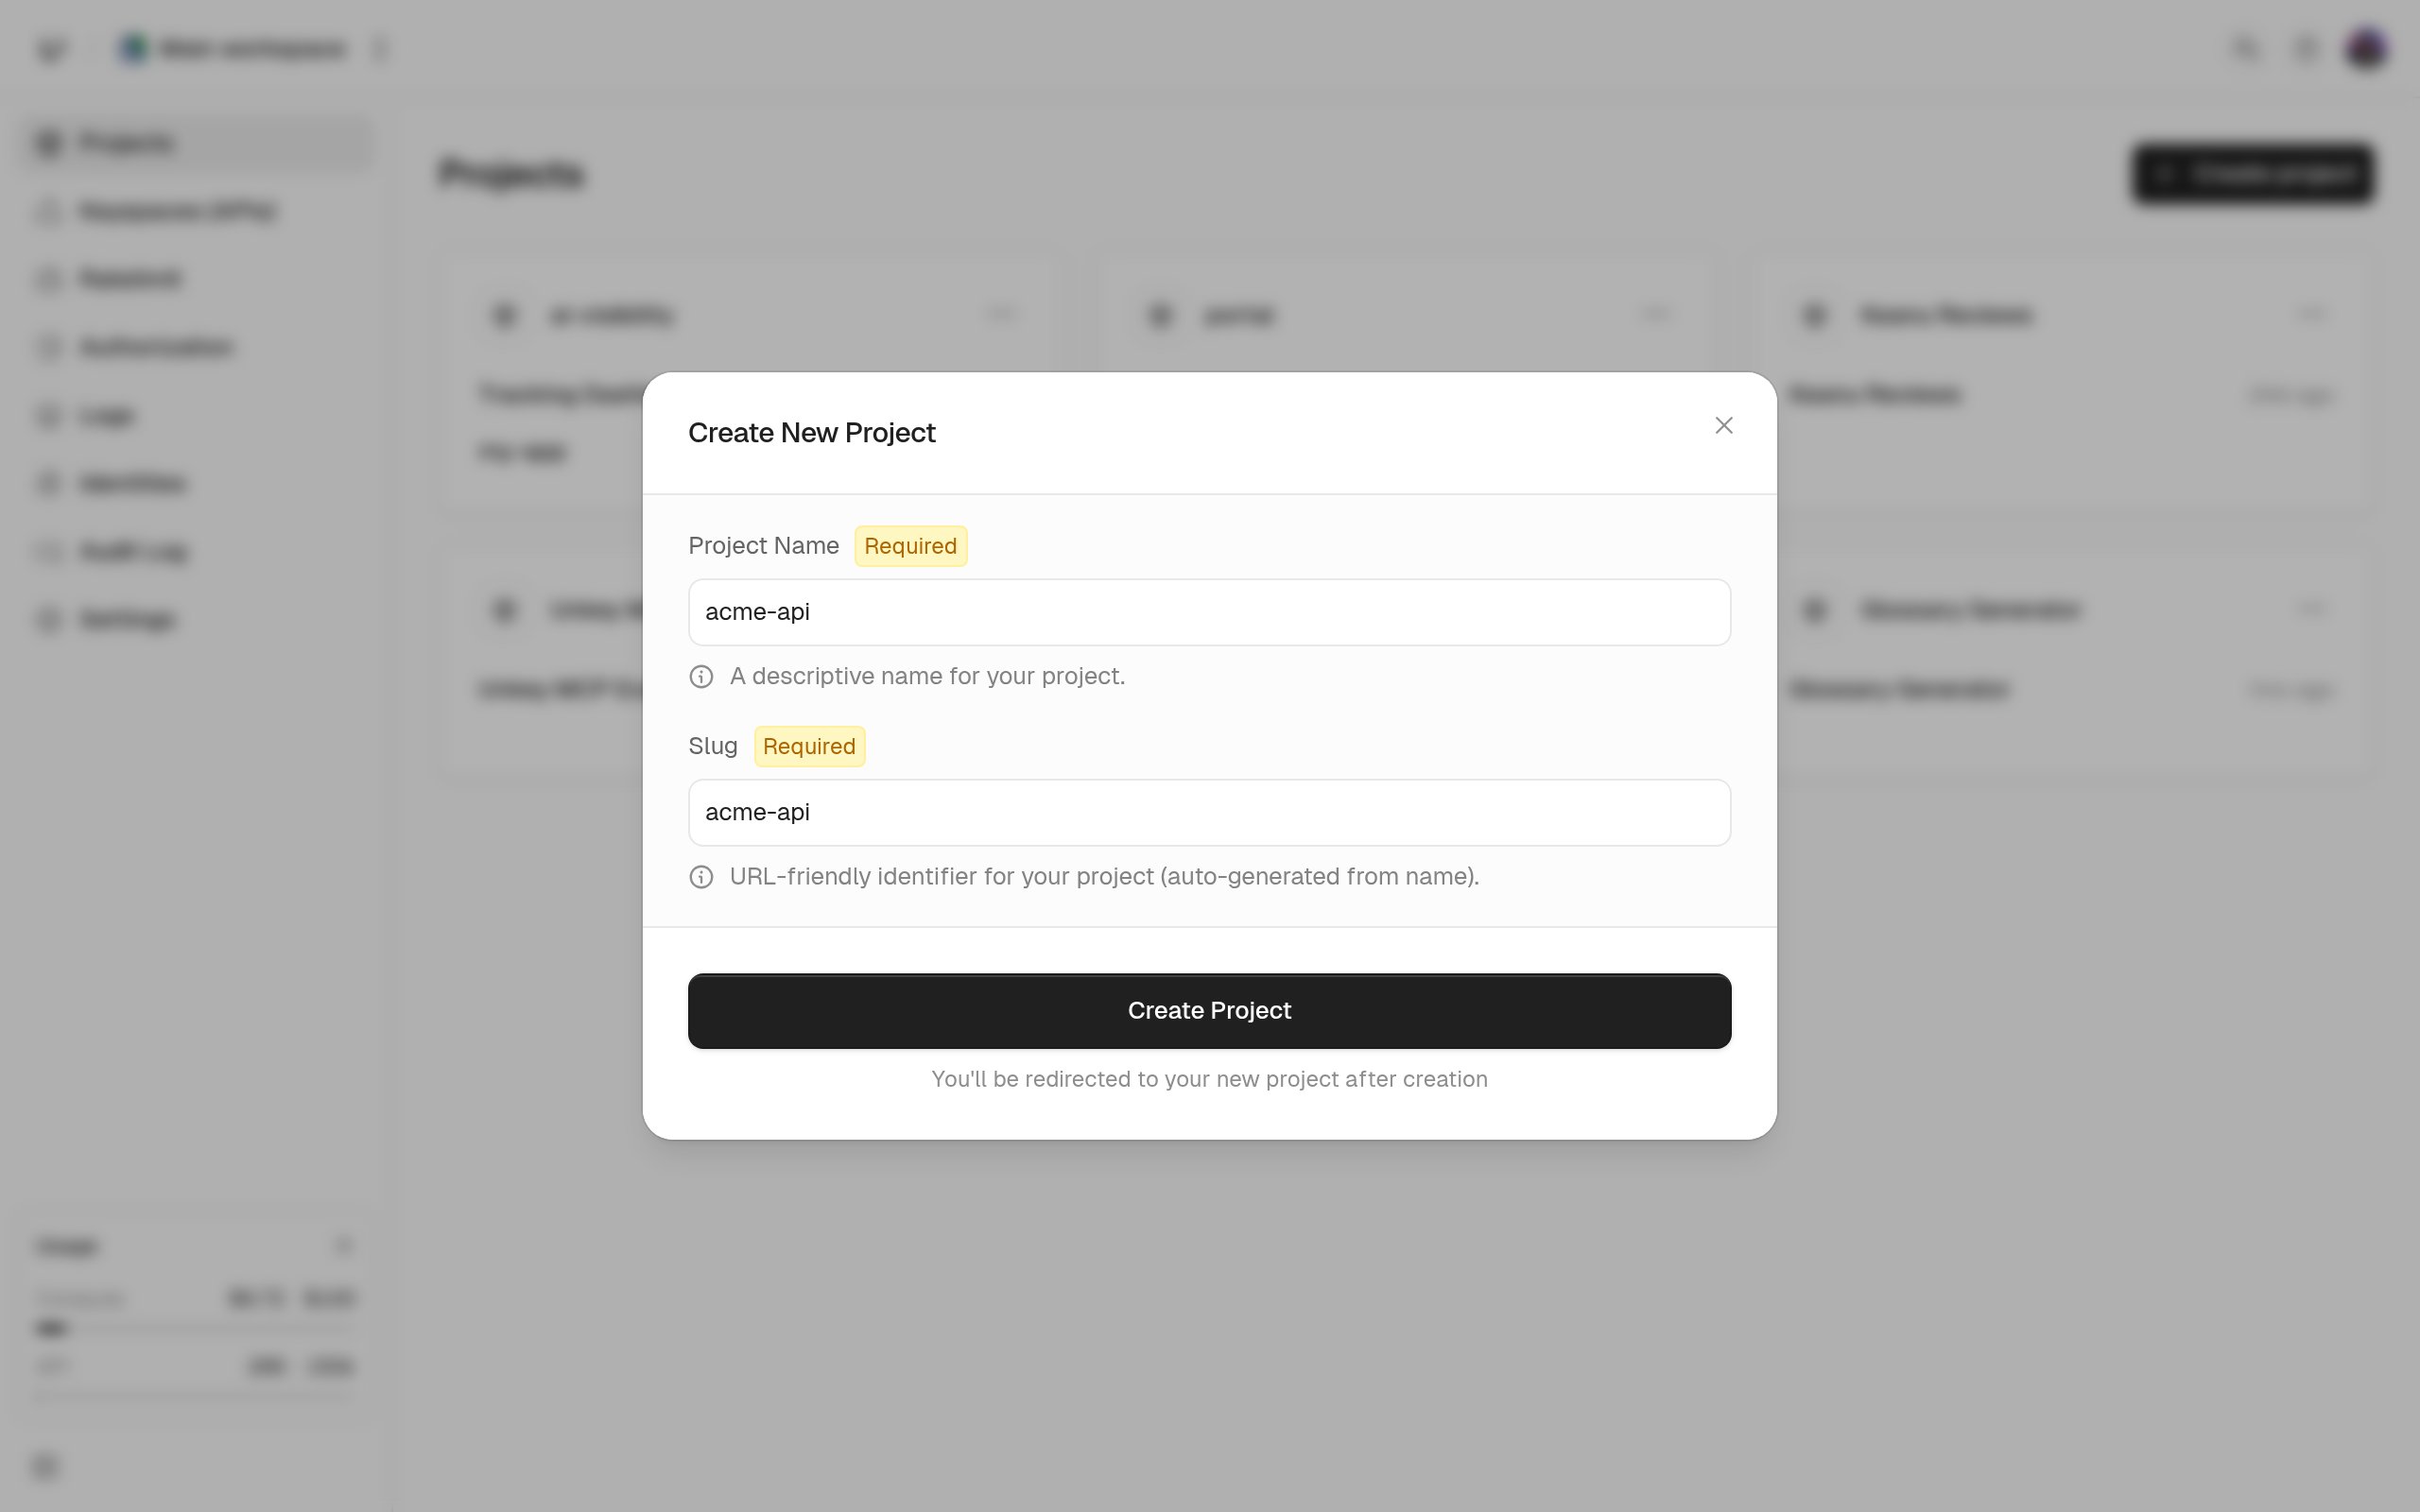
Open **Projects** in the dashboard and choose **Create project**. The dialog asks for a **Project Name** and a **Slug**. The slug is generated from the name, and you can edit it. The slug is the identifier you'll pass to the API and the CLI, it must be unique in your workspace, and `default` is reserved.
 A project is only a container. Creating one doesn't create an app, so the project page opens on an empty Apps list.
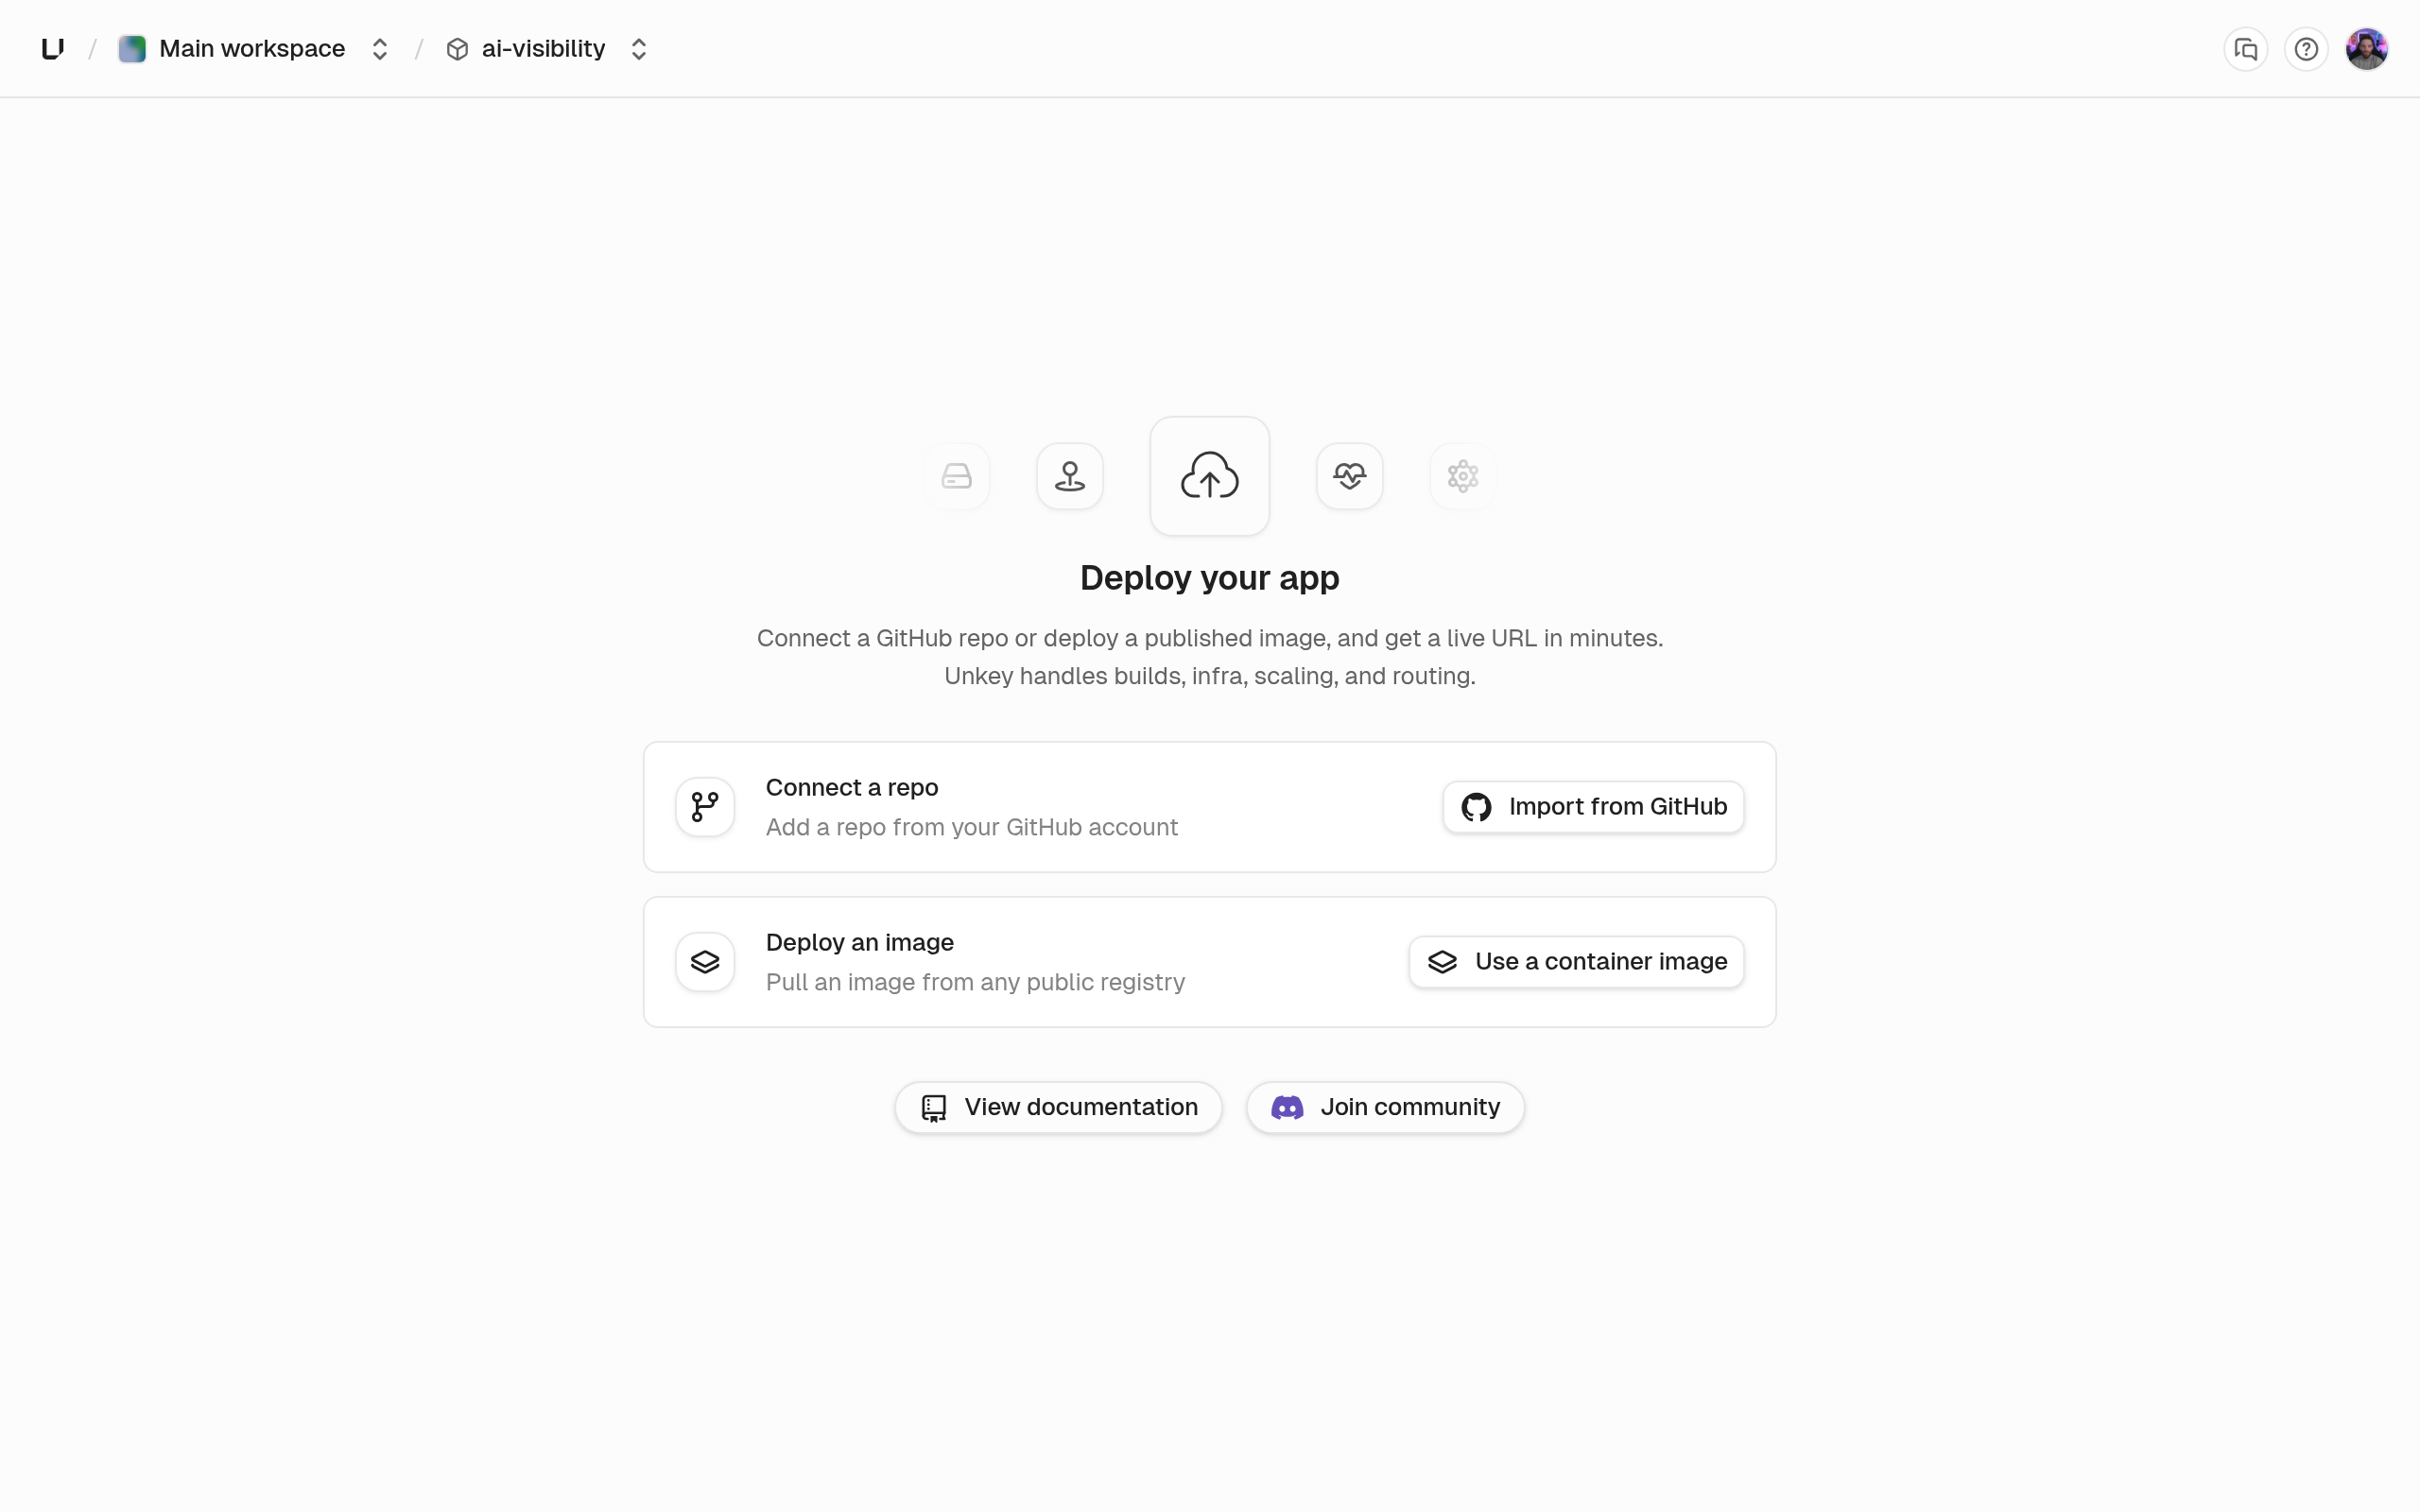
Choose **Create app**. The wizard first asks for an **App Name** and a **Slug** (unique within the project), then for a source. Pick **Import from GitHub**.
A project is only a container. Creating one doesn't create an app, so the project page opens on an empty Apps list.
Choose **Create app**. The wizard first asks for an **App Name** and a **Slug** (unique within the project), then for a source. Pick **Import from GitHub**.
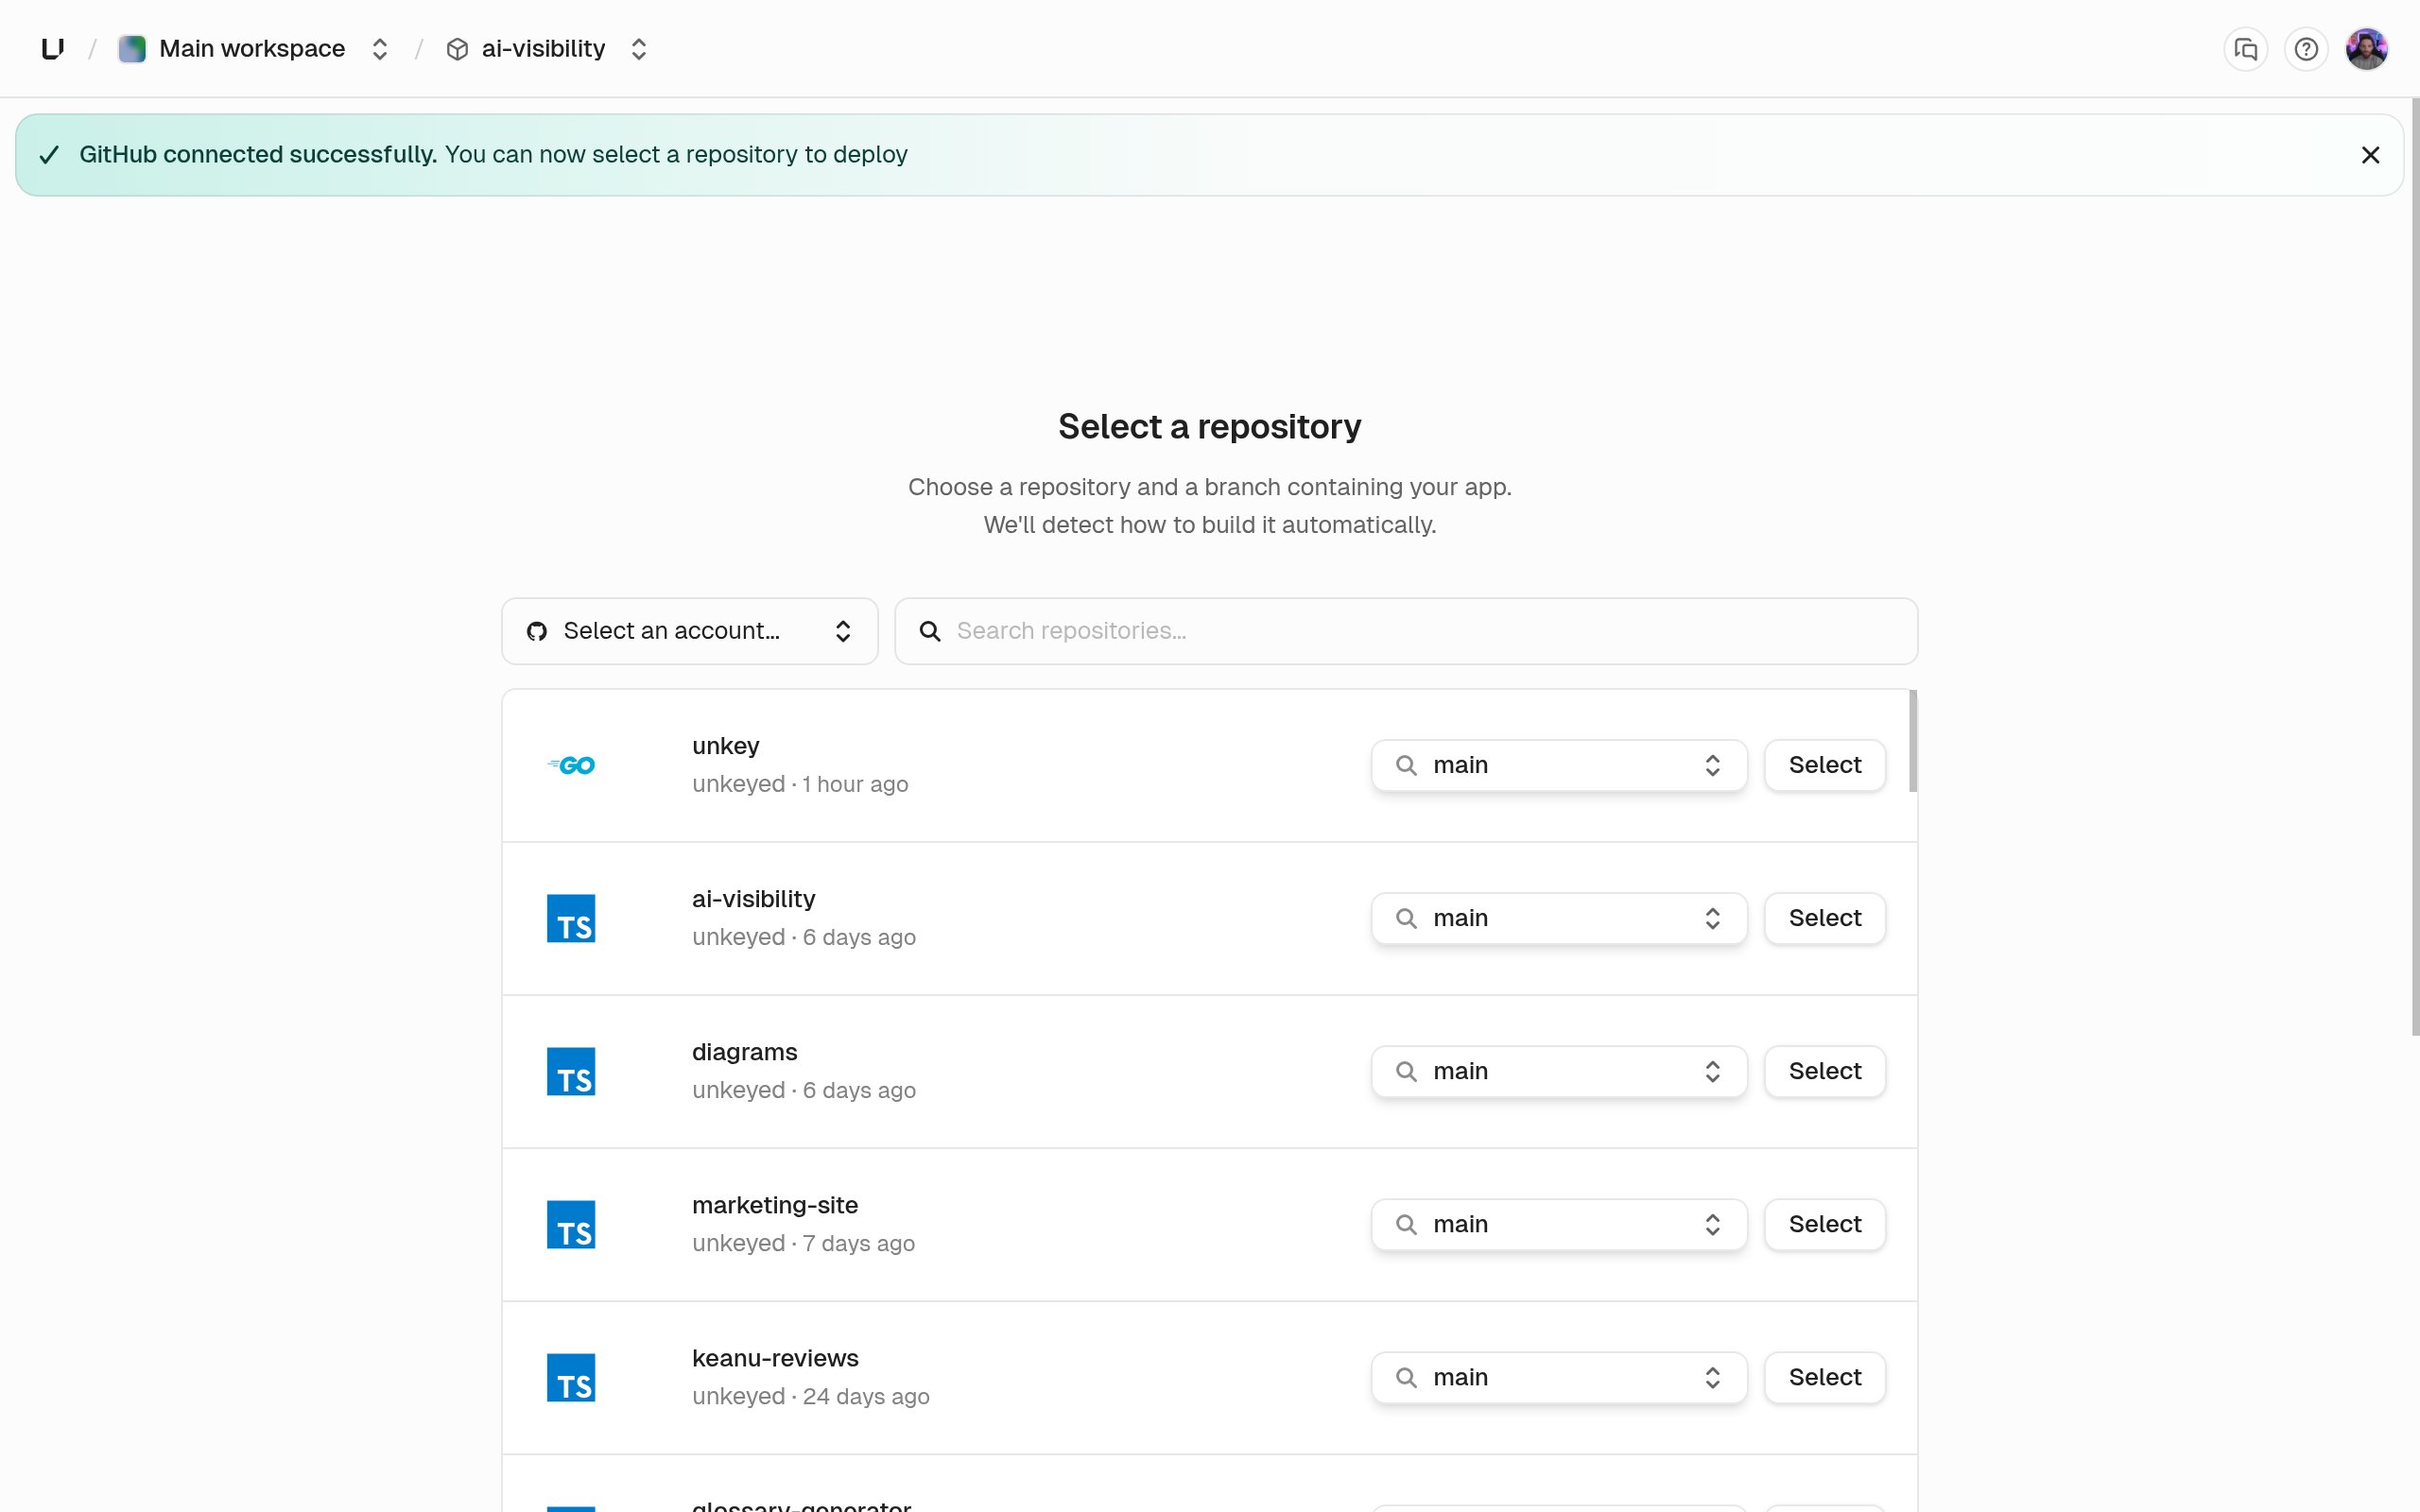
 If the workspace hasn't installed the Unkey GitHub App yet, the wizard sends you to GitHub to install it on your organization or personal account and grant access to repositories. GitHub returns you to the dashboard when you're done. The installation belongs to the workspace, so you do it once. Then pick the account and the repository under **Select a repository**. The app tracks the repository's default branch on GitHub unless you change the branch later in the app's settings.
 **Skip for now** creates the app without a repository. You can connect one later from the app's settings, or deploy an image instead.
The **Configure deployment** step shows the build settings for the new app. The defaults build most repositories without changes:
* **Root directory** `.`: the directory Unkey builds from. Point it at a subdirectory for a monorepo.
* **Dockerfile** automatic: with no Dockerfile set, Unkey detects your language and toolchain and builds the image for you. Pick a Dockerfile from the list to take full control of the image.
* **Build command**: overrides the detected build command. It's unused when a Dockerfile is set.
* **Watch paths**: leave empty to deploy on every push, or add glob patterns so pushes touching only other files are recorded as skipped instead of built.
* **Auto deploy** for production and for preview, both on.
Every field is described on [Build settings](/docs/compute/configure/build-settings).
Runtime settings aren't part of the wizard. The app's two environments start with the defaults, port 8080, 0.25 vCPU, 256 MiB of memory, and one replica in one region, and you change them later under **App Settings**. See [Runtime settings](/docs/compute/configure/runtime-settings). Your container must listen on the port in the `PORT` environment variable, which Unkey sets to the configured port.
The **Configure environment variables** step is optional. [Variables](/docs/compute/configure/environment-variables) are scoped to an environment, so production and preview can hold different values, and you can add a variable to all environments at once. Mark secrets as sensitive to make them write-only: you can replace or delete them later but never read them back. Variables are encrypted at rest either way. You can add or change variables at any time. A change applies to the next deployment.
Choose **Deploy**. The wizard creates a deployment in the production environment from the head of the app's default branch and shows its progress. The deployment moves through `pending`, `starting`, `building`, `deploying`, `network` (shown as **Assigning Domains**), and `finalizing` before it reaches `ready`. The build log streams while `building` runs. A first build waits its turn if another deployment in the workspace is running.
When the status is `ready` the app is live on its automatic domains. With a project `payments`, an app `api`, and a workspace `acme`, the production deployment answers on `payments-api-acme.unkey.app`, with further domains for the environment, the branch, and the exact commit. If the app slug is `default` the domains omit it and start with `payments-`. The deployment detail page lists every domain.
**Skip for now** creates the app without a repository. You can connect one later from the app's settings, or deploy an image instead.
The **Configure deployment** step shows the build settings for the new app. The defaults build most repositories without changes:
* **Root directory** `.`: the directory Unkey builds from. Point it at a subdirectory for a monorepo.
* **Dockerfile** automatic: with no Dockerfile set, Unkey detects your language and toolchain and builds the image for you. Pick a Dockerfile from the list to take full control of the image.
* **Build command**: overrides the detected build command. It's unused when a Dockerfile is set.
* **Watch paths**: leave empty to deploy on every push, or add glob patterns so pushes touching only other files are recorded as skipped instead of built.
* **Auto deploy** for production and for preview, both on.
Every field is described on [Build settings](/docs/compute/configure/build-settings).
Runtime settings aren't part of the wizard. The app's two environments start with the defaults, port 8080, 0.25 vCPU, 256 MiB of memory, and one replica in one region, and you change them later under **App Settings**. See [Runtime settings](/docs/compute/configure/runtime-settings). Your container must listen on the port in the `PORT` environment variable, which Unkey sets to the configured port.
The **Configure environment variables** step is optional. [Variables](/docs/compute/configure/environment-variables) are scoped to an environment, so production and preview can hold different values, and you can add a variable to all environments at once. Mark secrets as sensitive to make them write-only: you can replace or delete them later but never read them back. Variables are encrypted at rest either way. You can add or change variables at any time. A change applies to the next deployment.
Choose **Deploy**. The wizard creates a deployment in the production environment from the head of the app's default branch and shows its progress. The deployment moves through `pending`, `starting`, `building`, `deploying`, `network` (shown as **Assigning Domains**), and `finalizing` before it reaches `ready`. The build log streams while `building` runs. A first build waits its turn if another deployment in the workspace is running.
When the status is `ready` the app is live on its automatic domains. With a project `payments`, an app `api`, and a workspace `acme`, the production deployment answers on `payments-api-acme.unkey.app`, with further domains for the environment, the branch, and the exact commit. If the app slug is `default` the domains omit it and start with `payments-`. The deployment detail page lists every domain.
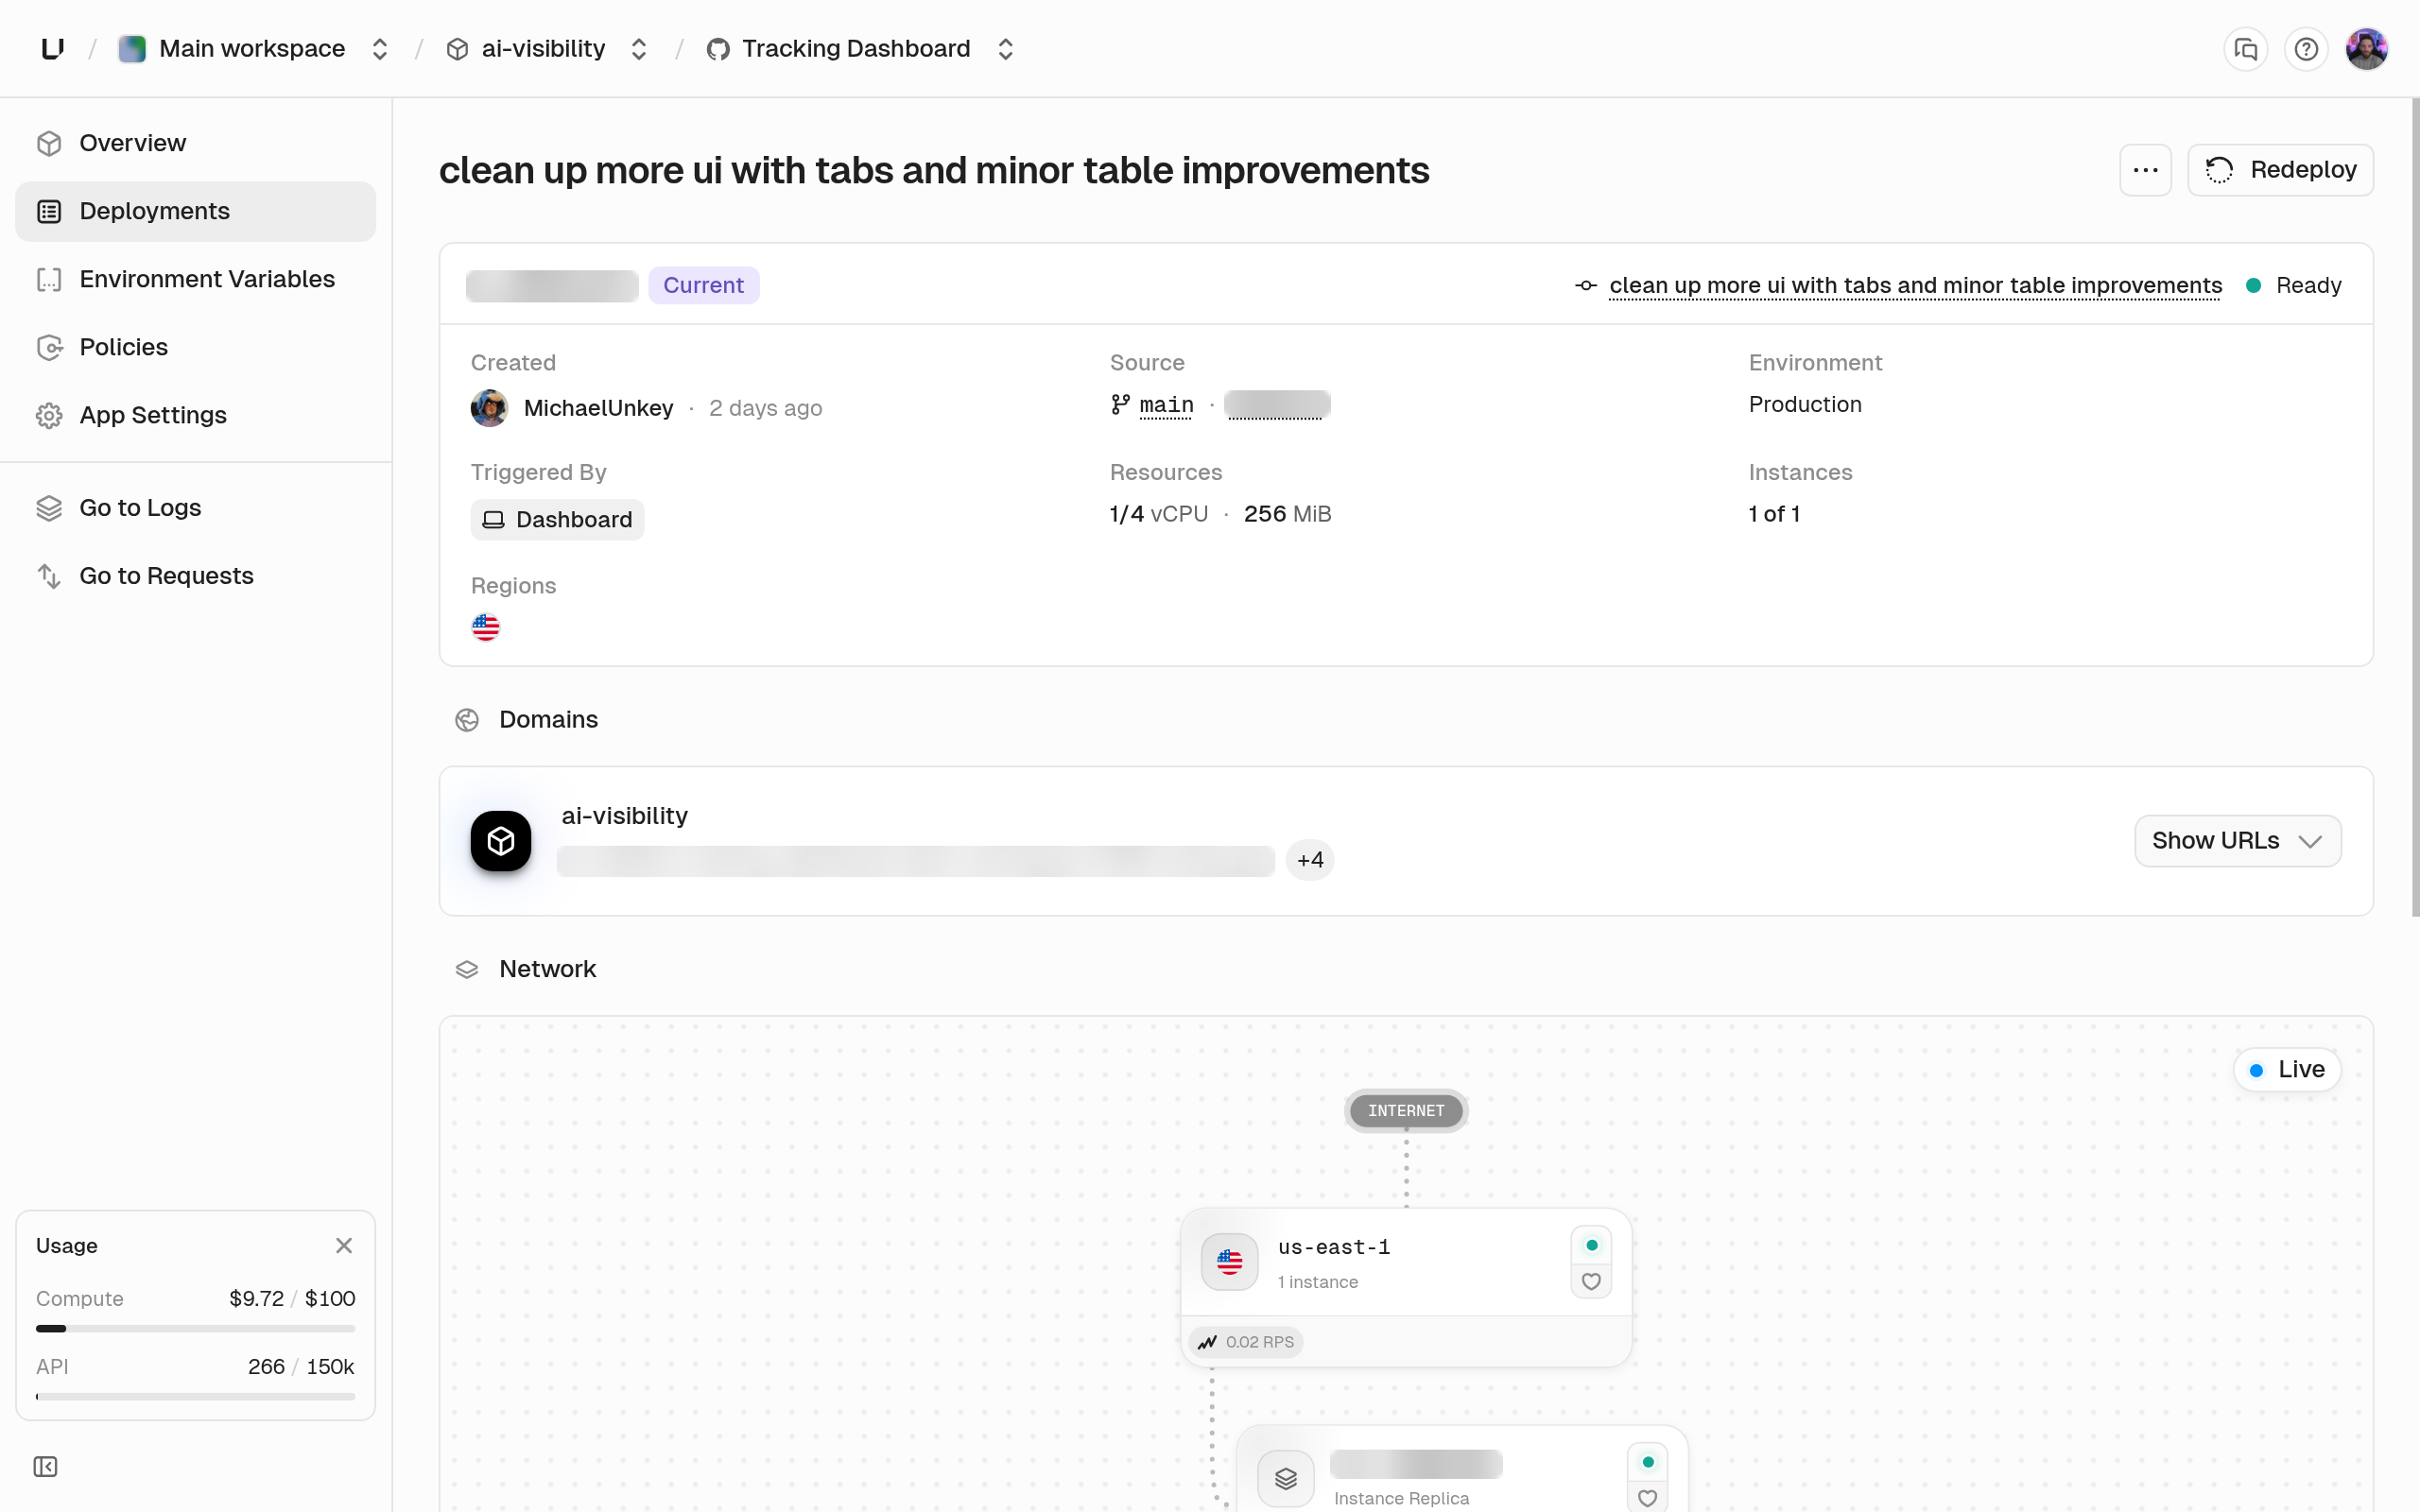 If the deployment ends `failed`, the detail page shows the step that failed and an error code. [Deployments](/docs/compute/concepts/deployments) lists the codes and what to change.
From now on GitHub tells Unkey about every push. A push to the app's default branch creates a production deployment, and when it reaches `ready` it becomes the live deployment and the production domains move to it. A push to any other branch creates a preview deployment with its own branch domain, so every branch has a URL you can share. A pull request from a fork is held in `awaiting_approval` until a project member approves it, because it runs code from outside your repository.
Auto deploy and watch paths decide whether a push builds at all. A push that isn't built is recorded as `skipped` with the reason.
The same flow through the API, with a root key in `Authorization: Bearer`. Each call is an HTTP `POST` to `https://api.unkey.com/v2/...` with a JSON body. Required permissions: `project.*.create_project`, `workspace.*.install_github`, `project.*.create_app`, `app.*.connect_repository` (only when `createApp` carries a `git.repository`), `environment.*.create_deployment`, and `environment.*.read_deployment`.
```bash Create the project theme={"system"}
curl -X POST https://api.unkey.com/v2/projects.createProject \
-H "Authorization: Bearer $UNKEY_ROOT_KEY" \
-H "Content-Type: application/json" \
-d '{"name":"Payments","slug":"payments"}'
```
```bash Install the GitHub App theme={"system"}
# Returns a GitHub URL to open in a browser; installation is workspace wide.
curl -X POST https://api.unkey.com/v2/github.installApp \
-H "Authorization: Bearer $UNKEY_ROOT_KEY" \
-H "Content-Type: application/json" \
-d '{}'
```
```bash Create the app with its repository theme={"system"}
curl -X POST https://api.unkey.com/v2/apps.createApp \
-H "Authorization: Bearer $UNKEY_ROOT_KEY" \
-H "Content-Type: application/json" \
-d '{"project":"payments","name":"Payments API","slug":"api","git":{"repository":"acme/payments"}}'
```
```bash Deploy the default branch to production theme={"system"}
curl -X POST https://api.unkey.com/v2/deployments.createDeployment \
-H "Authorization: Bearer $UNKEY_ROOT_KEY" \
-H "Content-Type: application/json" \
-d '{"project":"payments","app":"api","environment":"production","git":{}}'
```
```bash Poll until ready theme={"system"}
curl -X POST https://api.unkey.com/v2/deployments.getDeployment \
-H "Authorization: Bearer $UNKEY_ROOT_KEY" \
-H "Content-Type: application/json" \
-d '{"deploymentId":"d_..."}'
```
`getDeployment` returns `status`, `domains`, `availableActions`, and, when the status is `failed`, an `error` with a `code`. Poll until the status is one of `ready`, `failed`, `skipped`, `superseded`, `stopped`, or `cancelled`.
## Next steps
Promote, roll back, and what happens to older deployments.
Every status, the build queue, and the failure codes.
Change CPU, memory, replicas, and health checks.
Fork approval, watch paths, and what Unkey writes back to GitHub.
When you want the gateway in front of this app to check API keys before requests reach it, create a keyspace and keys in API Management, then attach a key-auth policy to the environment. Nothing in this guide depends on it.
If the deployment ends `failed`, the detail page shows the step that failed and an error code. [Deployments](/docs/compute/concepts/deployments) lists the codes and what to change.
From now on GitHub tells Unkey about every push. A push to the app's default branch creates a production deployment, and when it reaches `ready` it becomes the live deployment and the production domains move to it. A push to any other branch creates a preview deployment with its own branch domain, so every branch has a URL you can share. A pull request from a fork is held in `awaiting_approval` until a project member approves it, because it runs code from outside your repository.
Auto deploy and watch paths decide whether a push builds at all. A push that isn't built is recorded as `skipped` with the reason.
The same flow through the API, with a root key in `Authorization: Bearer`. Each call is an HTTP `POST` to `https://api.unkey.com/v2/...` with a JSON body. Required permissions: `project.*.create_project`, `workspace.*.install_github`, `project.*.create_app`, `app.*.connect_repository` (only when `createApp` carries a `git.repository`), `environment.*.create_deployment`, and `environment.*.read_deployment`.
```bash Create the project theme={"system"}
curl -X POST https://api.unkey.com/v2/projects.createProject \
-H "Authorization: Bearer $UNKEY_ROOT_KEY" \
-H "Content-Type: application/json" \
-d '{"name":"Payments","slug":"payments"}'
```
```bash Install the GitHub App theme={"system"}
# Returns a GitHub URL to open in a browser; installation is workspace wide.
curl -X POST https://api.unkey.com/v2/github.installApp \
-H "Authorization: Bearer $UNKEY_ROOT_KEY" \
-H "Content-Type: application/json" \
-d '{}'
```
```bash Create the app with its repository theme={"system"}
curl -X POST https://api.unkey.com/v2/apps.createApp \
-H "Authorization: Bearer $UNKEY_ROOT_KEY" \
-H "Content-Type: application/json" \
-d '{"project":"payments","name":"Payments API","slug":"api","git":{"repository":"acme/payments"}}'
```
```bash Deploy the default branch to production theme={"system"}
curl -X POST https://api.unkey.com/v2/deployments.createDeployment \
-H "Authorization: Bearer $UNKEY_ROOT_KEY" \
-H "Content-Type: application/json" \
-d '{"project":"payments","app":"api","environment":"production","git":{}}'
```
```bash Poll until ready theme={"system"}
curl -X POST https://api.unkey.com/v2/deployments.getDeployment \
-H "Authorization: Bearer $UNKEY_ROOT_KEY" \
-H "Content-Type: application/json" \
-d '{"deploymentId":"d_..."}'
```
`getDeployment` returns `status`, `domains`, `availableActions`, and, when the status is `failed`, an `error` with a `code`. Poll until the status is one of `ready`, `failed`, `skipped`, `superseded`, `stopped`, or `cancelled`.
## Next steps
Promote, roll back, and what happens to older deployments.
Every status, the build queue, and the failure codes.
Change CPU, memory, replicas, and health checks.
Fork approval, watch paths, and what Unkey writes back to GitHub.
When you want the gateway in front of this app to check API keys before requests reach it, create a keyspace and keys in API Management, then attach a key-auth policy to the environment. Nothing in this guide depends on it.